
Table of Contents
TogglePanda Crochet Pattern Free
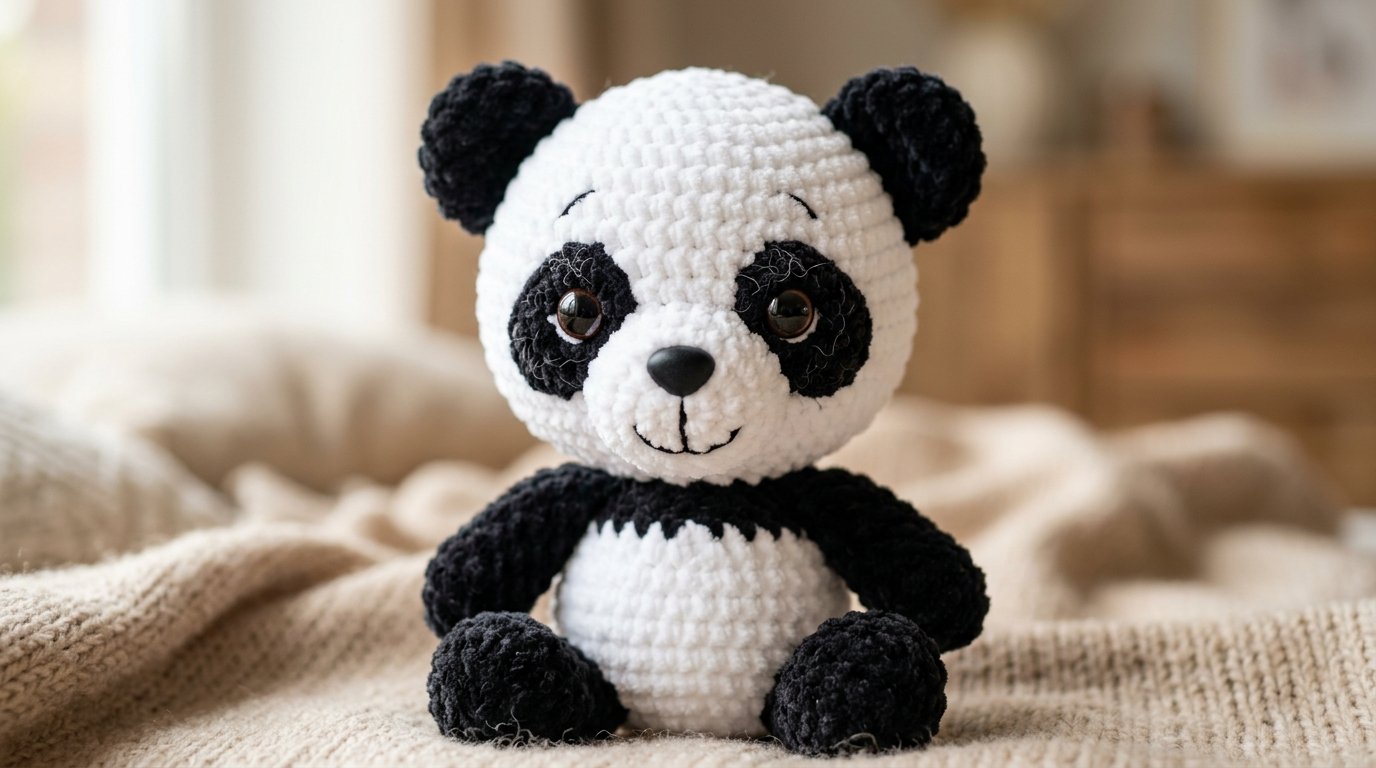
There is something especially lovable about a handmade crochet panda. The combination of a soft white body, bold black ears and limbs, and those unmistakable dark eye patches gives this little amigurumi an instantly recognizable personality.
This Panda Crochet Pattern Free project is designed around classic amigurumi construction while keeping the finished toy soft, rounded, and expressive. The body and head are shaped separately, while the smaller components are crocheted individually and attached during finishing.
The design works particularly well with plush chenille yarn because the fuzzy texture creates a soft, cuddly panda. However, the same construction can be adapted to cotton yarn if a smaller, more defined panda is preferred.
One of the most important lessons when making plush amigurumi is that stuffing and placement matter just as much as the crochet itself. A perfectly crocheted piece can still look uneven if the stuffing is added too quickly or the facial features are positioned without checking the proportions first. For this panda, gradual stuffing and careful placement are what create the rounded cheeks and friendly expression.
Why You’ll Love This Panda Amigurumi
This panda is a fun project for both confident beginners and experienced amigurumi makers.
You’ll love this pattern because it has:
- A soft, rounded plush shape
- Classic black-and-white panda coloring
- Separate ears, arms, legs, and tail
- Simple amigurumi construction
- Embroidered or safety-eye facial options
- Plenty of opportunities for customization
- A cute finished shape that works beautifully as a handmade gift
Skill Level
Intermediate Beginner
You should be comfortable with:
- Working in continuous rounds
- Magic rings
- Single crochet
- Increases and decreases
- Basic color changes
- Sewing amigurumi pieces together
The most important part is maintaining reasonably tight tension so the stuffing cannot be seen through the fabric.
Finished Size
With plush chenille yarn and a suitable hook, the finished panda will measure approximately 8–10 inches tall.
Your final size may vary depending on yarn thickness, hook size, tension, and the amount of stuffing used.
Materials You’ll Need
Yarn
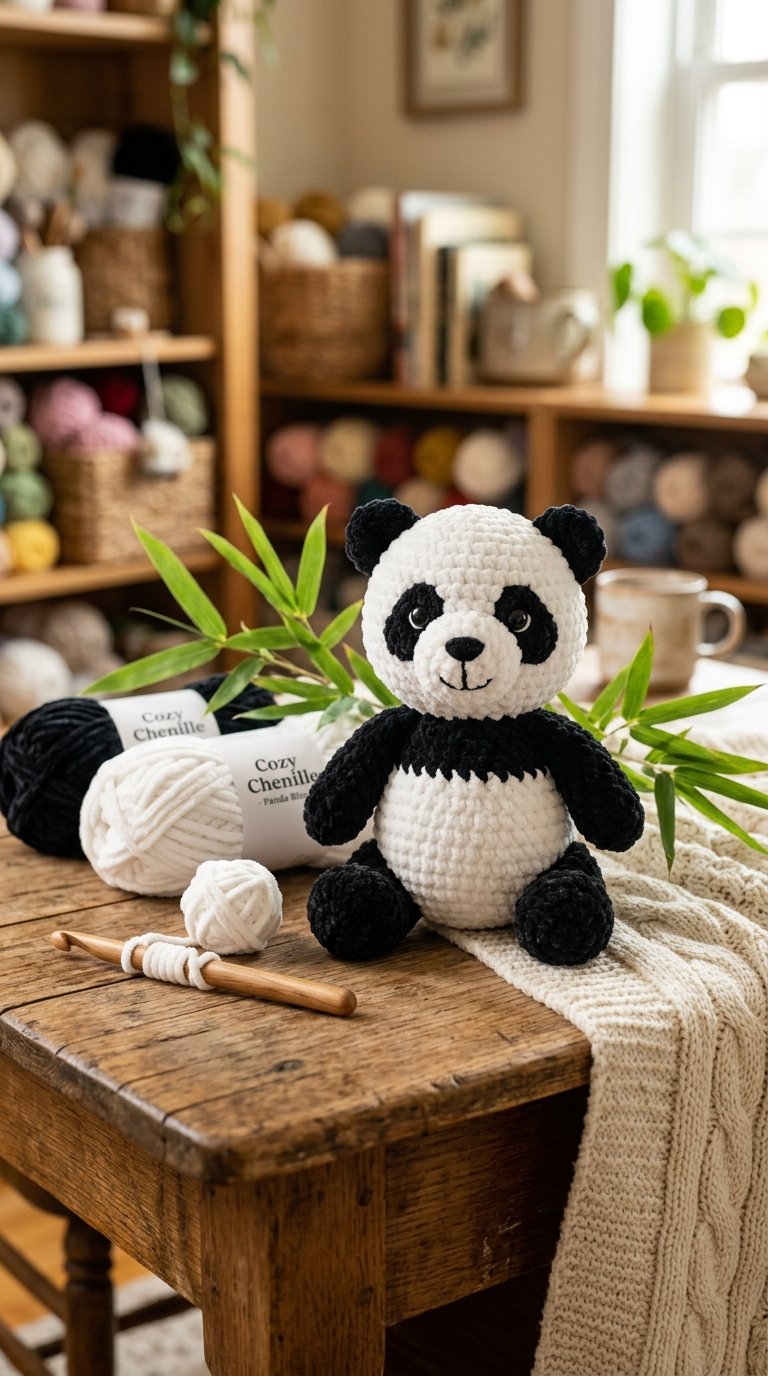
For a classic panda, you’ll need:
- White plush yarn – main body and head
- Black plush yarn – ears, arms, legs, eye patches, and tail
- Pink yarn – optional cheeks or inner details
Himalaya Dolphin Baby, YarnArt Dolce, Premier Parfait Chunky, or similar chenille yarns work particularly well.
Other Supplies
- 4 mm crochet hook
- 14–16 mm safety eyes
- Small black safety nose or black embroidery thread
- Polyester fiberfill
- Tapestry needle
- Stitch marker
- Sharp scissors
- Sewing pins
- Optional white embroidery thread for eye highlights
Safety note: If the panda is intended for a young child, embroidered eyes and facial details are safer than plastic safety components.
Crochet Abbreviations
- MR – Magic Ring
- ch – Chain
- sc – Single Crochet
- inc – Increase
- dec – Invisible Decrease
- sl st – Slip Stitch
- BLO – Back Loop Only
- FO – Fasten Off
When a number appears in parentheses, it indicates the total stitch count at the end of that round.
Pattern Notes
This panda is worked primarily in continuous rounds.
Use a stitch marker to identify the first stitch of every round. Plush yarn can make individual stitches difficult to see, so counting regularly is especially helpful.
Do not overstuff the pieces. The goal is a firm but flexible plush fabric rather than a hard toy.
When changing colors, make the final yarn-over of the previous stitch with the new color. This creates cleaner transitions.
Panda Crochet Pattern
Legs — Make 2
Begin with black yarn.
Round 1
Make a Magic Ring and crochet 6 sc into the ring. (6)
Round 2
Increase in every stitch. (12)
Round 3
(1 sc, inc) repeat around. (18)
Rounds 4–5
Sc around. (18)
Round 6
(2 sc, dec) repeat around. (12)
Lightly stuff the foot.
Rounds 7–9
Sc around. (12)
Fasten off the first leg.
Make the second leg in exactly the same way, but do not fasten off.
Joining the Legs
Place both legs next to each other and check that the feet point in the same direction.
Continue with the second leg.
Joining Round
Work 2 sc across the second leg, chain 2, then continue around the first leg and back across the chain space.
The exact joining position can be adjusted slightly so that both feet face forward.
Continue crocheting around the combined piece.
This creates the foundation of the panda’s body without requiring a separate seam between the legs.
Body
Continue with white yarn after joining the legs.
Round 1
Sc evenly around the joined legs. Adjust the first few stitches if necessary so the body remains centered.
Round 2
(3 sc, inc) repeat around.
Round 3
(4 sc, inc) repeat around.
Round 4
Sc around.
Round 5
(5 sc, inc) repeat around.
Rounds 6–9
Sc evenly around.
Begin stuffing the body gradually.
At this stage, the panda should have a slightly wider belly rather than a completely cylindrical shape.
Round 10
(4 sc, dec) repeat around.
Round 11
Sc around.
Round 12
(3 sc, dec) repeat around.
Continue adding small amounts of stuffing.
Round 13
(2 sc, dec) repeat around.
Round 14
Sc around.
The body should now narrow toward the neck.
Attaching the Arms
Before continuing the body, pin both black arms against the sides and check their height.
For a relaxed sitting panda, position the arms approximately halfway between the shoulders and belly.
You can sew them on afterward, or incorporate them into the body construction by crocheting through the arm and body together for several stitches.
For beginners, sewing the arms on after the body is finished is recommended because it provides greater control over symmetry.
Continue the body:
Round 15
(1 sc, dec) repeat around.
Round 16
Dec around until the opening becomes small.
Add the final amount of stuffing and close the opening neatly.
Fasten off and weave the yarn tail inside the body.
Head
The head is worked separately to create a fuller, rounder shape.
Use white yarn.
Round 1
Make a Magic Ring with 6 sc. (6)
Round 2
Inc around. (12)
Round 3
(1 sc, inc) around. (18)
Round 4
(2 sc, inc) around. (24)
Round 5
(3 sc, inc) around. (30)
Round 6
(4 sc, inc) around. (36)
Rounds 7–11
Sc around. (36)
This is the widest part of the head.
Begin positioning the eye patches before inserting the safety eyes.
Panda Eye Patches
The dark eye patches are what give this amigurumi its characteristic panda expression.
Instead of making separate black pieces, create the patches directly into the head using controlled color changes.
Work each patch as a small irregular oval around the intended eye position. The patch should be slightly angled rather than perfectly horizontal.
Keep the two patches as symmetrical as possible, but don’t worry if they aren’t mathematically identical—natural-looking handmade symmetry often gives amigurumi more personality.
Insert the safety eyes through the center of the black patches.
For an embroidered version, stitch the eyes after the head has been stuffed.
Continue Shaping the Head
Round 12
Begin decreasing gradually:
(4 sc, dec) repeat around.
Round 13
Sc around.
Round 14
(3 sc, dec) repeat around.
Round 15
(2 sc, dec) repeat around.
Begin stuffing the head.
Pay particular attention to both cheek areas. Add small amounts of fiberfill around the sides of the face rather than packing everything into the center.
Round 16
(1 sc, dec) repeat around.
Round 17
Dec around until only a small opening remains.
Finish stuffing.
Fasten off and close the remaining hole with a tapestry needle.
Ears — Make 2
Using black yarn:
Round 1
Make a Magic Ring with 6 sc. (6)
Round 2
Inc around. (12)
Round 3
(1 sc, inc) repeat around. (18)
Round 4
Sc around. (18)
Fasten off, leaving a long tail.
Do not stuff the ears.
Flatten each ear slightly and sew them to the top sides of the head.
Angle them outward just a little to create a softer, more playful expression.
Tail
Using black yarn:
Round 1
Magic Ring with 6 sc. (6)
Round 2
Inc around. (12)
Rounds 3–4
Sc around. (12)
Round 5
(2 sc, dec) repeat around. (9)
Lightly stuff the tail.
Fasten off and leave a sewing tail.
Attach the tail to the lower back of the body.
Facial Finishing
Once the head is completely assembled, examine the expression before adding any permanent embroidery.
A small embroidered mouth can be placed directly beneath the nose.
For a softer expression, use black embroidery floss and create a tiny curved smile.
You can also add:
- White eye highlights
- Tiny pink cheeks
- Small embroidered eyebrows
- A subtle line beneath the nose
Avoid adding too many details. The simplicity of the panda’s face is part of its charm.
Final Assembly
Place the head directly over the body and use sewing pins to hold it in position.
Check the panda from the front, side, and back before sewing.
Once you’re happy with the alignment, sew the head securely to the body using the tapestry needle and strong yarn.
Make several passes around the neck rather than relying on a single line of stitches. This creates a stronger connection and prevents the head from becoming loose with handling.
Finally, attach the ears, arms, and tail if they haven’t already been sewn on.
Hide all remaining yarn ends inside the body.
Expert Tips for a Professional Finish
Stuff Gradually
Adding stuffing only at the end often creates lumps. Instead, add small amounts every few rounds and shape the fiberfill with your fingers.
Keep the Eye Patches Balanced
The eye patches don’t need to be perfectly identical, but their overall size and angle should be similar. Pin the head temporarily before committing to the final position.
Don’t Overstuff the Head
An overly stuffed head can distort the stitches and make the eyes appear too far apart. Aim for a firm, rounded shape with a little flexibility.
Check the Pose Before Sewing
Place the panda on a table before permanently attaching the limbs. This is particularly important for the legs because a tiny difference in placement can affect how the finished panda sits.
Use Smaller Hooks When Necessary
If stuffing is visible through the stitches, your hook may be too large for your tension. Dropping down by 0.5 mm can make a significant difference.
Panda Customization Ideas
Once you finish the basic panda, you can easily turn it into a completely different character.
Try adding:
- A tiny crochet bamboo branch
- A removable scarf
- A miniature brown hat
- A bow around the neck
- A tiny backpack
- A flower crown
- Embroidered sleepy eyes
- Pastel-colored ears and accessories
For a nursery-themed version, cream and gray yarn can create a softer panda-inspired palette.
How to Care for Your Crochet Panda
For plush yarn versions, spot cleaning is generally the easiest option.
If deeper cleaning is necessary, gently hand wash the toy in cool water with a mild detergent. Avoid aggressive rubbing because it can disturb the plush fibers.
Press excess water out with a towel and allow the panda to air dry completely on a flat surface.
Avoid high heat, particularly with chenille yarn and plastic safety components.
Frequently Asked Questions
Is this panda crochet pattern suitable for beginners?
Yes, especially for crocheters who already understand basic amigurumi stitches. The construction is straightforward, although color changes and assembly require a little extra attention.
What yarn is best for a plush panda?
Chenille yarn produces the softest and cuddliest result. Cotton yarn is better if you want a smaller panda with clearly visible stitches.
Can I make the panda larger?
Yes. Use thicker yarn with an appropriately sized hook. Keep your tension tight enough that the stuffing remains hidden.
Can I embroider the eyes instead?
Absolutely. Embroidered eyes are a great alternative when making toys for young children.
Can the limbs be movable?
The basic version uses sewn limbs. If you want an articulated panda, you can adapt the construction with toy joints, but make sure the hardware is appropriate for the intended recipient.
Final Thoughts
This Panda Crochet Pattern Free project is a wonderful example of how simple amigurumi techniques can create an incredibly expressive handmade toy. The contrasting black-and-white colorwork, rounded cheeks, little ears, and soft limbs give the finished panda plenty of personality without requiring complicated stitches.
The most important part of the process is taking your time with stuffing, facial placement, and assembly. Those details determine whether your panda looks flat and uneven or soft, balanced, and professionally finished.
Once you’ve made one panda, experiment with different yarn colors, accessories, and expressions. A handmade crochet panda can become much more than a simple amigurumi—it can become a personalized keepsake that reflects the creativity and care behind every stitch.