
Few crochet projects are as charming as a tiny handmade duck. With its round body, cheerful beak, little wings, and oversized feet, a duck amigurumi instantly brings a smile to anyone who sees it. Whether you’re making a thoughtful baby shower gift, decorating a nursery, or simply adding another project to your amigurumi collection, this cuddly duck is a fun and rewarding crochet companion.
This original Duck Amigurumi Pattern was designed with simplicity, balance, and soft shaping in mind. Instead of relying on complicated techniques, the project uses classic amigurumi construction with carefully shaped pieces that come together to create a polished plush toy. Every section is intentionally designed to be approachable for confident beginners while still providing enough detail to satisfy experienced crocheters.
One of the things experienced amigurumi designers quickly discover is that the personality of a handmade toy comes from its proportions rather than complicated stitches. Rounded cheeks, slightly oversized feet, neatly positioned wings, and careful stuffing all contribute to creating a duck that feels full of life. Spending a few extra minutes shaping each piece before assembly often makes a much bigger difference than adding decorative details later.
Another reason this project is so enjoyable is its versatility. Soft chenille yarn produces an irresistibly cuddly plush duck, while cotton yarn creates a smaller decorative version with crisp stitch definition. By simply changing the colors or adding tiny accessories like a bow, scarf, or miniature hat, you can create an entire family of ducks, each with its own unique personality.
Whether you’re crocheting your very first plush toy or expanding an existing collection of handmade animals, this duck is a relaxing project that combines simple construction with adorable results.
Why You’ll Love This Duck Amigurumi Pattern
This duck was designed to be both beginner-friendly and enjoyable for experienced crocheters. Every section is worked separately before final assembly, making the project easy to manage and customize.
Some favorite features include:
- Soft rounded body with balanced proportions
- Cute oversized beak for extra personality
- Small plush wings with gentle curves
- Stable webbed feet that help the duck sit upright
- Beginner-friendly shaping using basic amigurumi techniques
- Perfect size for gifting or nursery décor
- Easily customizable with different colors and accessories
Skill Level
Easy to Intermediate
This pattern is suitable for crocheters who are comfortable working in continuous rounds and understand basic amigurumi stitches including the magic ring, single crochet, increases, and invisible decreases.
Finished Size
The finished size depends on the yarn and hook combination you choose.
Approximate measurements:
- Plush chenille yarn: 8–10 inches (20–25 cm)
- Velvet yarn: 7–9 inches (18–23 cm)
- Worsted-weight cotton yarn: 5–6 inches (13–15 cm)
Crochet tension may slightly affect the final dimensions.
Materials You’ll Need
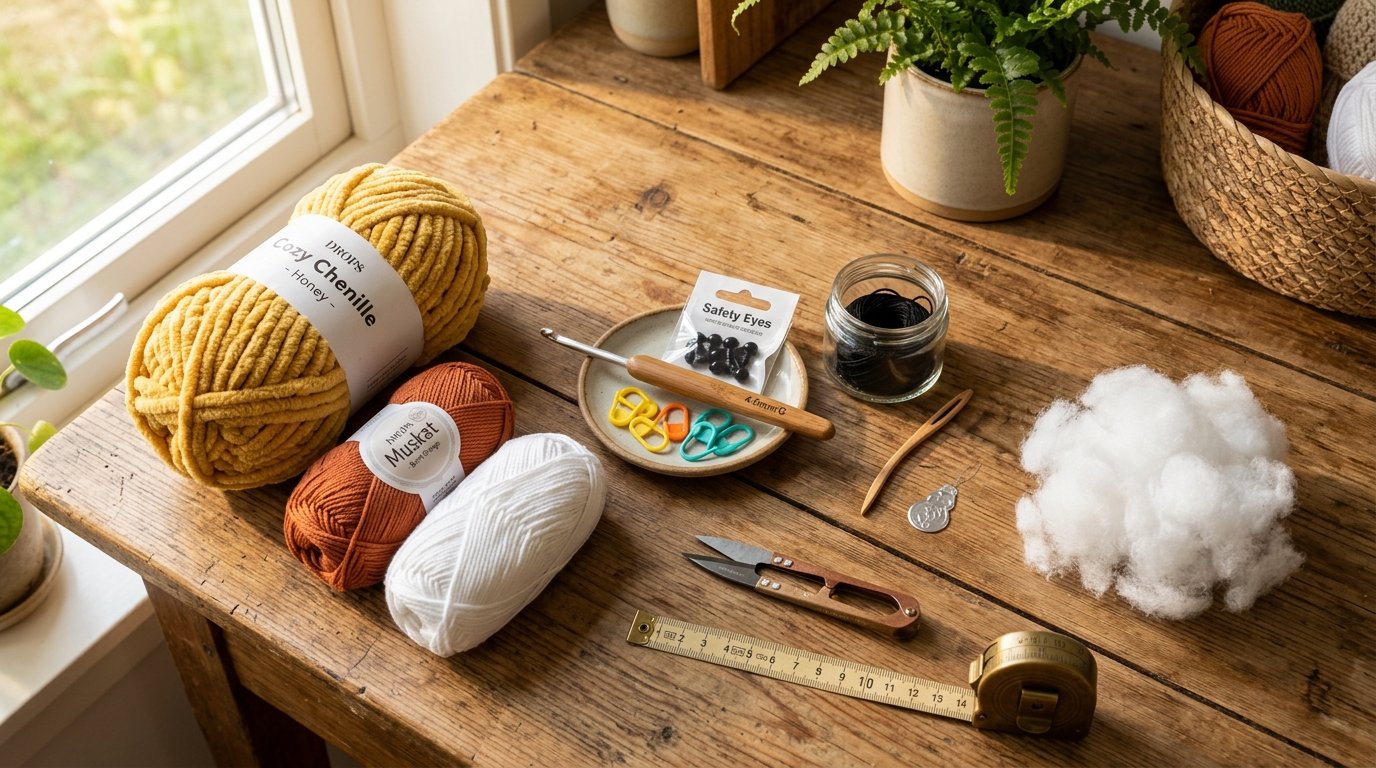
Gathering your supplies before beginning will make the project more enjoyable and help maintain consistent results.
Yarn
Choose a soft plush yarn for the cuddliest finish.
Suggested colors:
- Bright yellow (main color)
- Orange (beak and feet)
- White (optional tummy or wing accents)
- Black embroidery thread
- Pink yarn for optional blush
Recommended Yarn
This project works beautifully with:
- Himalaya Dolphin Baby
- Premier Parfait Chunky
- Bernat Blanket Baby
- Honey Bunny Plush
- Velvet chenille yarn
Cotton yarn can also be used if you’d prefer a smaller decorative duck with sharper stitch definition.
Crochet Hook
A 4 mm crochet hook works well with most plush yarns.
If stuffing begins showing through your stitches, simply decrease your hook size by 0.5 mm for a firmer fabric.
Additional Supplies
You’ll also need:
- Polyester fiberfill
- Safety eyes (12–16 mm)
- Stitch markers
- Tapestry needle
- Sewing pins
- Sharp embroidery scissors
- Measuring tape
Crochet Abbreviations
Throughout this pattern, the following abbreviations are used:
- MR – Magic Ring
- ch – Chain
- sc – Single Crochet
- inc – Increase
- dec – Invisible Decrease
- sl st – Slip Stitch
- hdc – Half Double Crochet
- dc – Double Crochet
- BLO – Back Loop Only
- FLO – Front Loop Only
Pattern Notes
Before starting, keep these helpful tips in mind:
- Work continuously in spirals unless otherwise noted.
- Mark the beginning of every round.
- Stuff each piece gradually instead of all at once.
- Use invisible decreases whenever possible.
- Count stitches frequently for symmetrical shaping.
- Pin all pieces before sewing to check placement.
Consistent tension is one of the biggest factors in creating a professional-looking amigurumi, especially when using plush yarn.
Original Duck Amigurumi Pattern
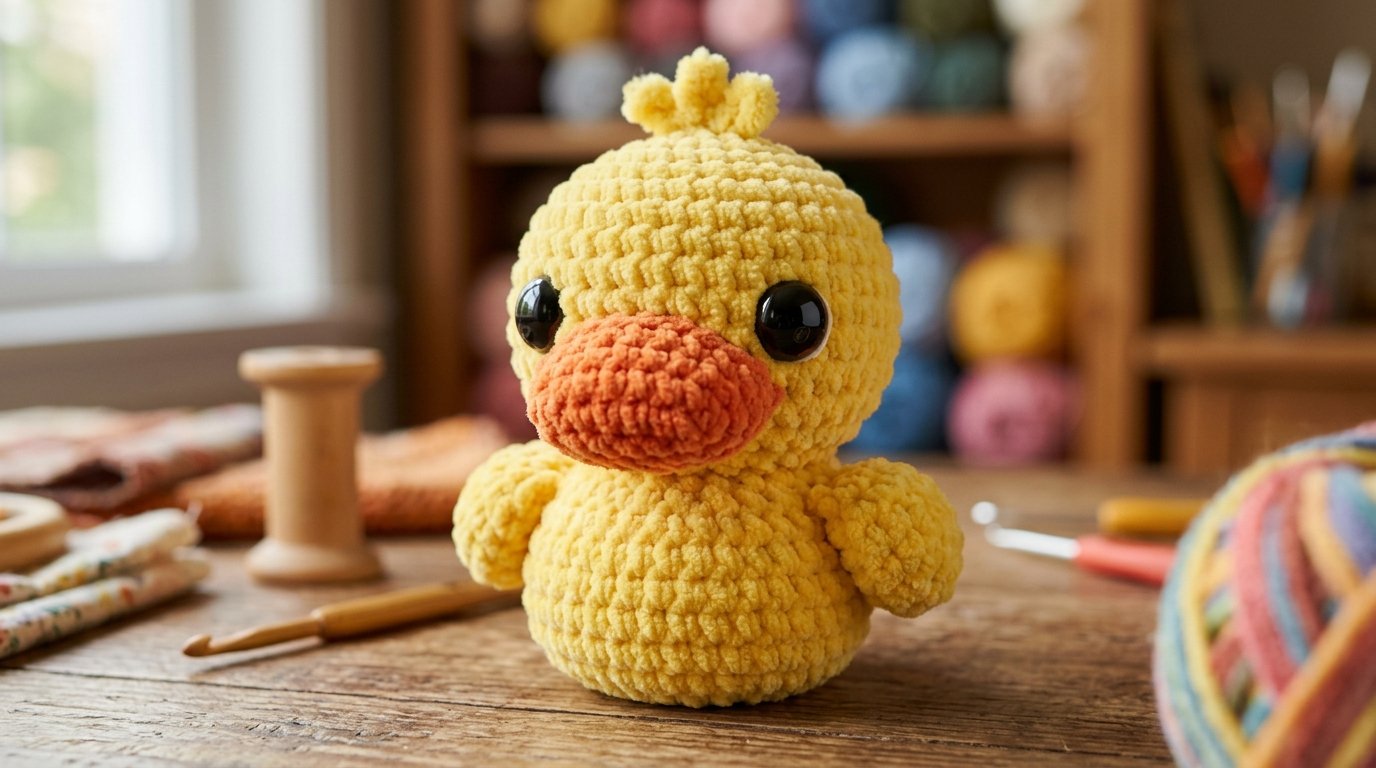
Head
Using yellow yarn, begin with a Magic Ring.
Round 1: Work 6 single crochet into the Magic Ring. (6)
Round 2: Increase in every stitch around. (12)
Round 3: (Sc, Inc) repeat around. (18)
Round 4: (2 Sc, Inc) repeat around. (24)
Round 5: (3 Sc, Inc) repeat around. (30)
Round 6: (4 Sc, Inc) repeat around. (36)
Rounds 7–11: Single crochet evenly around.
Insert safety eyes between Rounds 8 and 9, spacing them evenly.
Begin stuffing the head firmly.
Round 12: (4 Sc, Dec) repeat around.
Round 13: (3 Sc, Dec) repeat around.
Continue stuffing.
Round 14: (2 Sc, Dec) repeat around.
Round 15: (Sc, Dec) repeat around.
Round 16: Decrease evenly until the opening is nearly closed.
Fasten off, leaving a long tail for sewing.
Beak
Using orange yarn.
Create a Magic Ring with 6 stitches.
Increase gradually over the next two rounds to form a rounded oval shape.
Work two additional rounds without increasing.
Lightly stuff if desired before sewing to the front of the head.
A neatly embroidered smile beneath the beak adds extra charm.
Wings (Make Two)
Using yellow yarn.
Create a Magic Ring with 6 stitches.
Increase once around.
Work several rounds evenly before folding the piece in half.
Crochet across both layers to close, creating a soft curved wing.
Leave a long tail for sewing.
Feet (Make Two)
Using orange yarn.
Begin with a Magic Ring.
Increase gradually over several rounds to create a rounded foot.
Work one round evenly.
Flatten slightly before closing.
Shape gently with your fingers to create a natural webbed appearance.
Avoid overstuffing the feet so they remain soft and flexible.
Before Moving to the Body
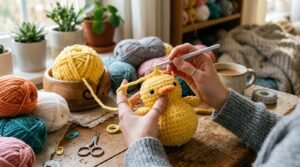
At this stage, you should have a completed head, beak, two wings, and two feet ready for assembly. Take a few moments to compare both wings and feet to ensure they are the same size. Small adjustments made now will help your finished duck look balanced and symmetrical.
It is also a good idea to pin the beak temporarily onto the head before sewing. This allows you to experiment with placement and create the friendly expression you prefer. Once you’re satisfied with the proportions, you’ll be ready to crochet the body and bring your duck to life.
Body
Using yellow yarn, the body is worked from the bottom upward to create a smooth, rounded shape that gives the duck its signature cuddly appearance. Stuff the body gradually as you crochet to maintain an even shape.
Round 1: Create a Magic Ring and work 6 single crochet into the ring. (6)
Round 2: Increase in each stitch around. (12)
Round 3: (Sc, Inc) repeat around. (18)
Round 4: (2 Sc, Inc) repeat around. (24)
Round 5: (3 Sc, Inc) repeat around. (30)
Round 6: (4 Sc, Inc) repeat around. (36)
Rounds 7–11: Single crochet evenly around to build the body.
Begin adding fiberfill, concentrating on the lower half to help the duck sit upright.
Round 12: (4 Sc, Dec) repeat around.
Continue stuffing while maintaining a smooth rounded shape.
Round 13: (3 Sc, Dec) repeat around.
Round 14: (2 Sc, Dec) repeat around.
Leave the opening wide enough to attach the head securely.
Fasten off with a long sewing tail.
Tail
The small tail gives the duck extra character and balances the overall silhouette.
Using yellow yarn, create a small rounded triangle by beginning with a Magic Ring and increasing gently over two rounds. Fold the piece slightly before sewing it to the back of the body so it angles upward naturally.
A slightly curved tail gives the finished duck a playful appearance.
Assembly Instructions
Assembly is where your duck truly comes to life.
Begin by positioning the head directly above the center of the body. Use sewing pins to hold everything in place before stitching. Once you’re satisfied with the proportions, sew the head securely around the neckline, adding a little extra stuffing if necessary to keep the neck firm.
Next, attach the beak to the lower center of the face. Position it so the top edge sits just below the safety eyes, creating a cheerful, balanced expression.
Sew each wing onto the sides of the body at the same height. Rather than placing them perfectly flat, angle them slightly forward to give the duck a relaxed, natural pose.
Attach the feet underneath the body with equal spacing. Before sewing completely, place the duck on a flat surface to ensure it sits evenly without tipping.
Finally, attach the tail to the back of the body, centering it just above the base. A slight upward angle creates a playful finish.
Facial Details
Simple embroidered details can dramatically increase your duck’s personality.
Using black embroidery thread, stitch a tiny smiling mouth beneath the beak. Keep the smile short and slightly curved for a gentle expression.
If desired, embroider tiny eyelashes above each eye or add small white highlights to create a bright, lively appearance.
For an extra sweet look, lightly blush each cheek using soft pink yarn or fabric-safe blush powder.
These finishing touches help transform a simple crochet toy into a character with warmth and charm.
Finishing Touches
Once every piece has been attached, inspect your duck from every angle.
Check that:
- The head sits straight.
- Both wings are level.
- The feet are evenly spaced.
- The tail is centered.
- All yarn ends are securely woven inside.
Gently massage the stuffing with your fingers to smooth any uneven areas. If you’re using plush yarn, lightly brushing the finished duck with a soft pet brush can create an even fluffier texture.
Expert Designer Tips
One of the biggest secrets to creating beautiful amigurumi isn’t complicated stitch work—it’s careful shaping. Instead of stuffing each section tightly all at once, add small amounts of fiberfill as you crochet. This creates smooth curves and prevents visible lumps.
When attaching the head, pin it first and step back to view your duck from multiple angles. A slight adjustment can completely change the expression and overall balance of the finished toy.
If you’re using plush yarn, work slowly and count stitches often. The fuzzy texture can make stitches harder to see, so a stitch marker becomes your best friend throughout the project.
Finally, don’t worry about making every duck identical. Handmade toys are special because each one develops its own unique personality.
Fun Customization Ideas
Once you’ve completed your first duck, there are endless ways to make future versions unique.
Try adding:
- A tiny crochet sailor hat
- A colorful bow tie or ribbon
- A miniature scarf for winter
- Floral headband for spring
- Small overalls with embroidered pockets
- A removable backpack
- A tiny fish, flower, or heart accessory
- Different beak colors for unique characters
You can also experiment with pastel yellow, white, mint green, lavender, baby blue, peach, or cream yarn to create an entire family of adorable ducks.
Care Instructions
To keep your handmade duck looking beautiful for years:
- Spot clean whenever possible.
- Hand wash gently using cool water and mild detergent.
- Do not wring or twist the plush fabric.
- Remove excess moisture by pressing with a clean towel.
- Lay flat to air dry completely.
- Store away from direct sunlight to prevent fading.
With proper care, your handmade duck will remain soft and cuddly for years to come.
Frequently Asked Questions
Is this duck suitable for beginners?
Yes. The pattern uses basic amigurumi techniques with simple shaping, making it an excellent project for confident beginners.
Which yarn works best?
Super bulky chenille or velvet yarn creates the softest plush duck, while cotton yarn gives a smaller decorative finish with crisp stitch definition.
Can I make a larger duck?
Absolutely. Using thicker yarn and a larger crochet hook will naturally increase the finished size while maintaining the same proportions.
Are safety eyes required?
No. Embroidered eyes are a wonderful alternative, especially if the toy is intended for young children.
How long does it take to finish?
Most crocheters can complete this project over a weekend, although beginners may prefer to spread it across several shorter crafting sessions.
Final Thoughts
Crocheting a duck amigurumi is a delightful project that combines simple techniques with charming results. From shaping the soft rounded body to attaching the tiny wings and cheerful beak, every step contributes to a handmade companion full of personality.
One of the greatest joys of amigurumi is knowing that no two creations are ever exactly alike. Small differences in stuffing, facial details, and accessory choices give every duck its own unique character, making each finished project truly special. Whether displayed on a nursery shelf, gifted to a loved one, or added to your own handmade collection, this adorable crochet duck is sure to bring smiles for years to come.
As your confidence grows, don’t hesitate to experiment with new colors, outfits, and accessories. Every new version is another opportunity to explore your creativity and create a one-of-a-kind keepsake that reflects your personal style. Happy crocheting!